Appearance
Website Integration
Our JavaScript snippet is the easiest way to integrate Pirsch into your website. If you don't want to load JavaScript on your website, have a look at our server-side integration and custom domains.
INFO
Looking for code? Check out our demo repository on GitHub!
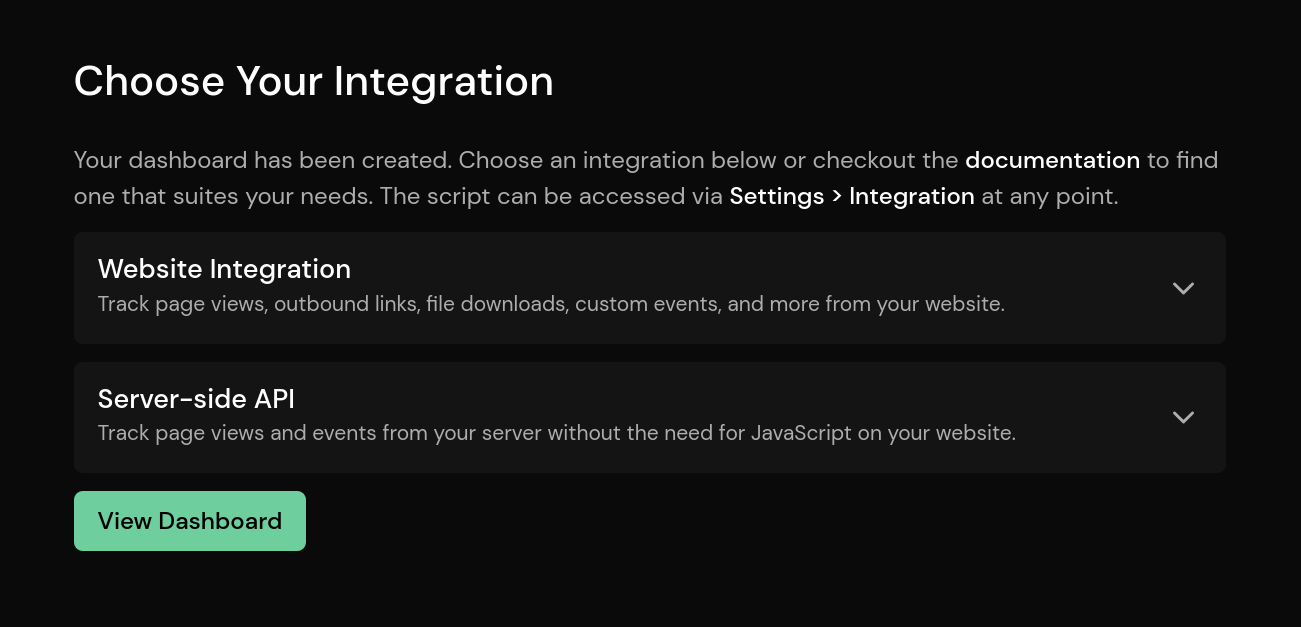
Adding Pirsch to Your Website
Once you have created your account, you can add Pirsch to your website.
- Open the dashboard and click on the plus icon in the menu.
- Enter the hostname of your website (such as example.com), the subdomain, and select a time zone.
- Click on Create Dashboard.
- Select and open your preferred integration.
- Copy and paste the JavaScript snippet into the
<head>section of your website.
And you're done! Your website is now sending traffic to Pirsch.
Note that only page views for the hostname you enter will be accepted. A pageview for sub.example.com will not be accepted if you've configured example.com. They are considered completely different websites and you will need to add a new dashboard or create an additional domain for them.
You can also create rollup views to combine data from multiple sites.
The script also tracks programmatic URL changes by default. This is useful if your site is a single page application (SPA) or if you use anchors. You can disable this behavior by adding the data-disable-history parameter to the script. Certain features might not work on SPAs. Check the troubleshooting article to learn more.
Client Hints improve the accuracy of the statistics collected for you. Make sure to forward them to our service.
Testing the Integration
Please refer to the troubleshooting article.
Including and Excluding Pages
The snippet provides a very flexible way to include or exclude pages. You can exclude one or more pages by specifying the data-exclude attribute. The content is a list of regular expressions used to filter pages.
html
<script defer src="https://api.pirsch.io/pa.js"
    id="pianjs"
    data-code="YOUR_IDENTIFICATION_CODE"
    data-exclude="\/exact\/match,\/exclude\/page\/(en|de)\/.*"></script>
This example will match the page /exact/match and any page starting with /exclude/page/en/ or /exclude/page/de/.
Please always validate your expressions before using them and make sure you don't see any errors in the browser console. Special regex characters must be escaped. For a simple single page filter use a pattern like \/your\/page.
data-include can be used to whitelist pages. With whitelisting, only pages that match a pattern in the list will send a page view. The blacklist still applies.
Enabling/Disabling Certain Features
It's possible to enable or disable certain features of the scripts. To enable or disable a feature, simply add an attribute to the script tag.
data-disable-queryremoves all query parameters from the URL, including UTM parameters.data-disable-referrerwill removes the referrer.data-disable-resolutionremoves the screen resolution (width and height).data-disable-historydisables the tracking of programmatic URL changes as page views (like PWAs for example).data-disable-page-viewsdisables the collection of page views.data-disable-outbound-linksdisables the tracking of outbound link clicks.data-disable-downloadsdisables the tracking of file downloads.data-enable-sessionsenables session extension.
Here is an example:
html
<script defer src="https://api.pirsch.io/pa.js"
    id="pianjs"
    data-code="YOUR_IDENTIFICATION_CODE"
    data-disable-query></script>
Adding a Suffix/Prefix to the Path or Title
It's possible to alter the page path and/or title. For example, setting the data-path-prefix on the script to /blog and visiting your website on /article/1 would be displayed as /blog/article/1 on the dashboard.
Here is how that would look like for the script:
html
<script defer src="https://api.pirsch.io/pa.js"
    id="pianjs"
    data-code="YOUR_IDENTIFICATION_CODE"
    data-path-prefix="/blog"></script>
To add a prefix or suffix, or to change the page title (displayed in the browser tab), add one of the following attributes:
data-path-prefixadds a path prefixdata-path-suffixadds a path suffixdata-title-prefixadds a path prefixdata-title-suffixadds a path suffix
Please not that the attributes interacts with the data-domain attribute used to create rollup views.
Initializing the Script Manually
The script automatically tracks outbound link clicks, file downloads and more. If you load the script dynamically (i.e. construct the script via JavaScript and place it on your site), you may need to manually call the init function to initialize the events. Here is an example:
js
// Construct the snippet.
const snippet = document.createElement("script");
snippet.src = "https://api.pirsch.io/pa.js";
snippet.id = "pianjs";
snippet.setAttribute("data-code", "YOUR_IDENTIFICATION_CODE");

// Add the snippet to the site and init Pirsch.
document.body.appendChild(snippet);
snippet.addEventListener("load", () => pirschInit());
Ignoring Your Own Page Views
You can disable this integration by setting the DNT (Do Not Track) header to 1 in your browser, or by adding a value called disable_pirsch to your local storage.
For the latter option, open the developer tools (usually F12 or Ctrl + Shift + I) in your browser and navigate to the web storage tab. Click on local storage and add a new value disable_pirsch and 1 as the value. After reloading the page, no page views or events (if you also use the event script) should be sent to Pirsch.
Testing Pirsch Locally
The scripts will ignore any requests made on localhost. If you want to override this behavior, e.g. for testing, you can add the data-dev attribute. The host names must match. If you are testing on localhost, rewrite the hostname with the `data-dev' attribute like this
html
<script defer src="https://api.pirsch.io/pa.js"
    id="pianjs"
    data-code="YOUR_IDENTIFICATION_CODE"
    data-dev="example.com"></script>
In this case, the hostname you've configured on the Dashboard is example.com. So you need to add data-dev="example.com" to rewrite the hostname.
Resetting the Identification Code
Your site is identified by the host name from which the request is made and an identification code. The identification code must be placed inside the JavaScript snippet. If you ever need to recreate the code, go to the Settings page for your site and generate a new one. You'll then need to replace the old code.
html
<script defer src="https://api.pirsch.io/pa.js"
    id="pianjs"
    data-code="YOUR_IDENTIFICATION_CODE"></script>
Custom Domains
It's possible to serve the Pirsch scripts from your own domain. You can learn how to do this here.
Privacy Policy
If required in your country, you can use our template to add a paragraph to your privacy policy about the use of Pirsch.